We’ve all been there – when we need to write a long documentation document about the latest system we’ve built. Or when you want to write an ebook but your thoughts come faster than your typing – and typing distracts you.
When video (or audio) is the easiest format for you to create content – how do you convert it into text – easy, fast and free?
Let’s say you want to record a screengrab video and then convert it into a blogpost. Or you prefer recording all your books in audio and want your VA to prepare the text for editing. Here are the steps to take in order to achieve that:
1. Record your video with Loom
Loom is a free browser extension and desktop app. I like it because it’s easy to use, takes care of the job in a second and can provide you with a video in a couple of minutes.
Don’t focus on how you look, focus on how and what you’re saying – talk at a normal pace, speak clearly and try to keep your thought on the subject.
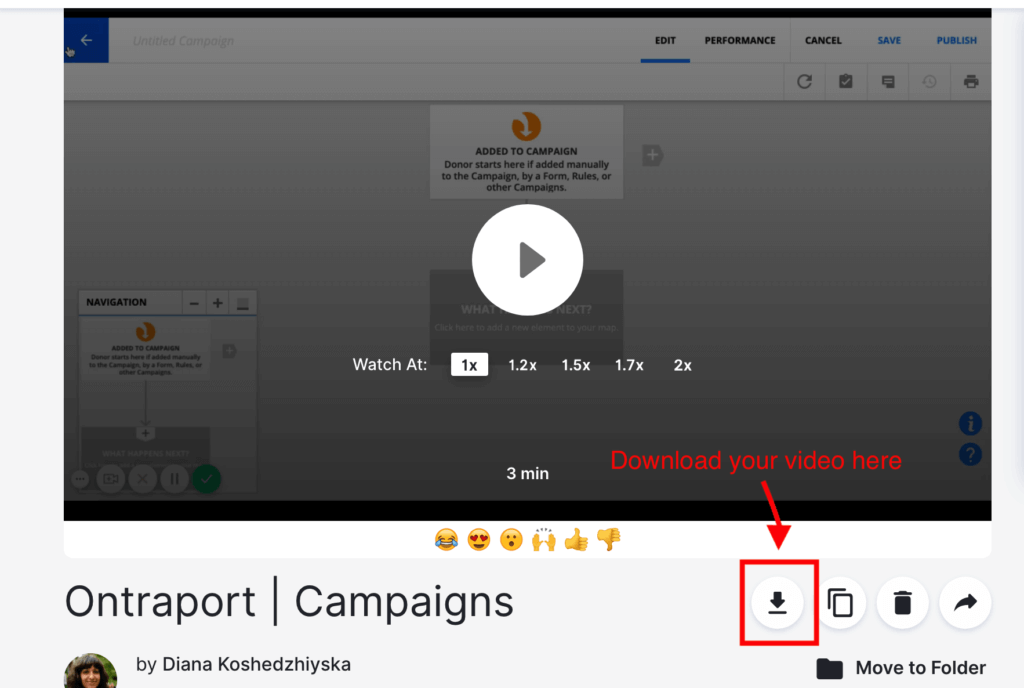
Download your video and proceed to the next step
2. Upload video as unlisted on YouTube
Open YouTube, go to your channel and click Upload Video – make sure you’re uploading it as an unlisted or private video – so that people don’t see what you’ve published.
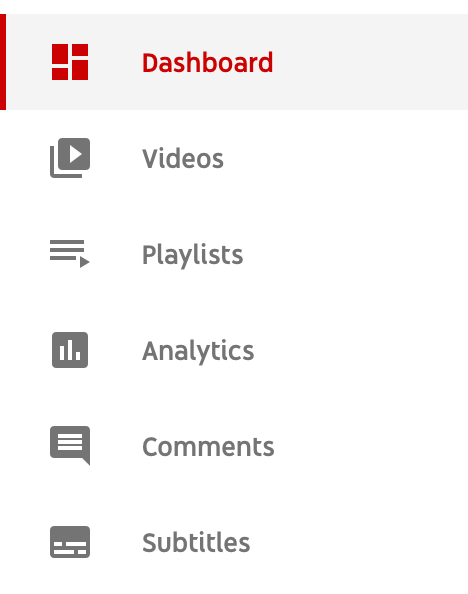
After you upload the video, open YouTube Studio and open the Subtitles menu from the left navigation bar.
3. Wait and get your YouTube automatic subtitles.
Yes, it’s that simple – I’ve found that I need to wait between 5 and 15 minutes to have automatic subtitles generated for me. Get that SBV file and head over to step 4.
Grab them here and keep the file.
4. Convert SVB file to TXT
The file you just downloaded is an SVB file – it needs to be converted to TXT so that all the time stamps are removed. I use a free online tool for this. You can find it here.
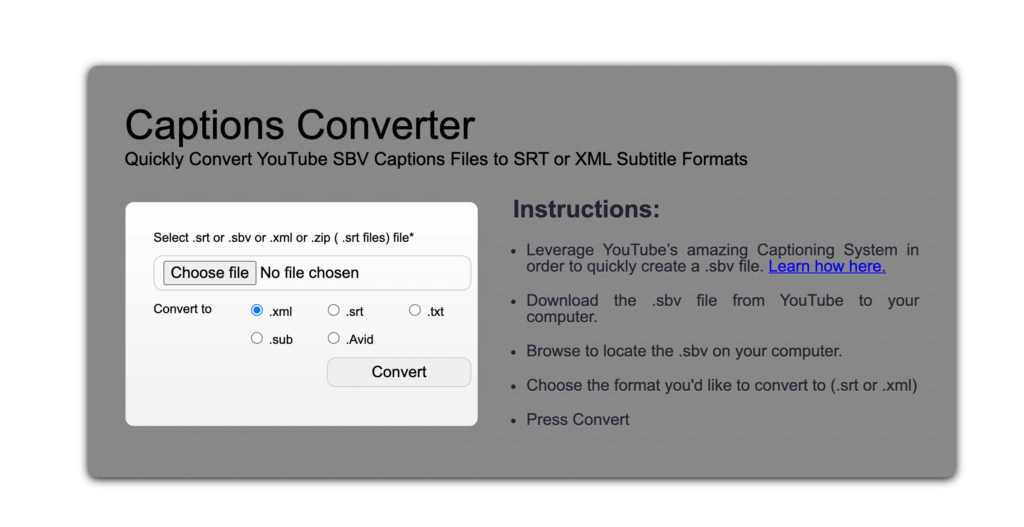
Upload your file, select the output file format to TXT and get your new file.
5. Remove Line Breaks
Open the TXT file you just downloaded and you’ll realize that your speech is cut into multiple lines – like subtitles are. We need to remove these line breaks so that it’s easy to read and edit.
I use a tool called TextFixer to do this in less than a second.
Select the whole text, copy it, open this tool in your browser and paste the text there.
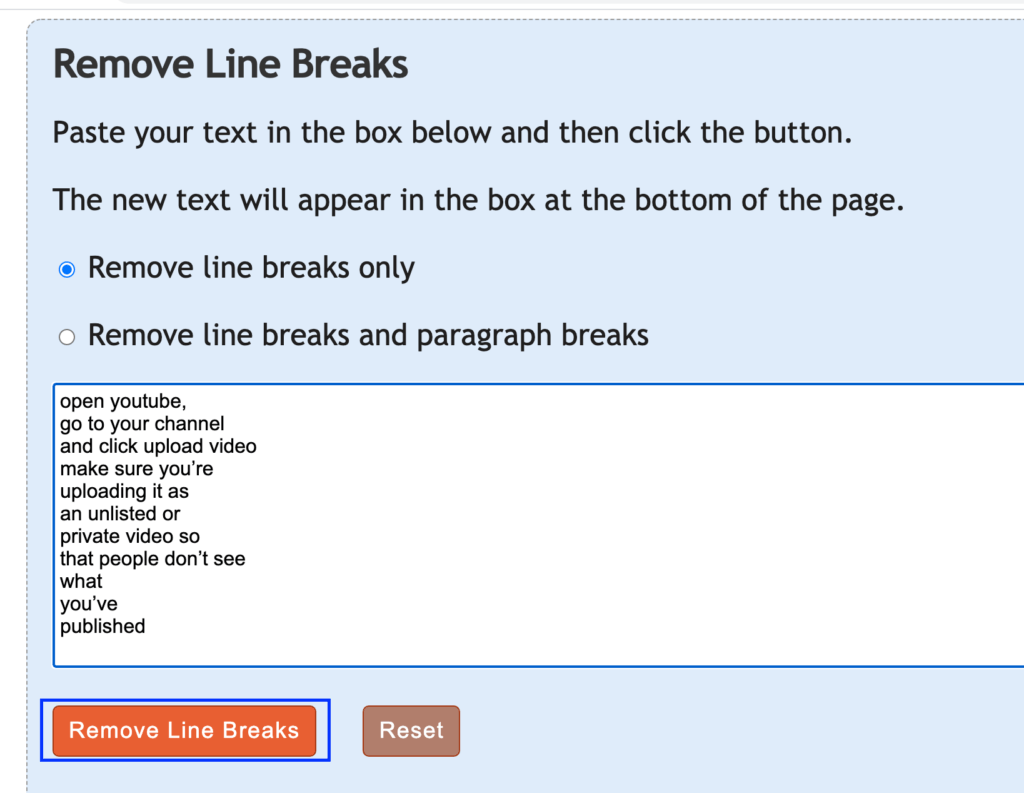
Click the Remove Line Breaks button – and you’ve got yourself a text that has no new lines and paragraphs! That’s what we needed!
6. Edit
Copy the text without paragraphs and line breaks and paste it into a Google or Word doc. From there, you can start adding full stops where you see the sentence ends. I recommend you do this while simultaneously playing the original video – it’s easier to hear the pauses.
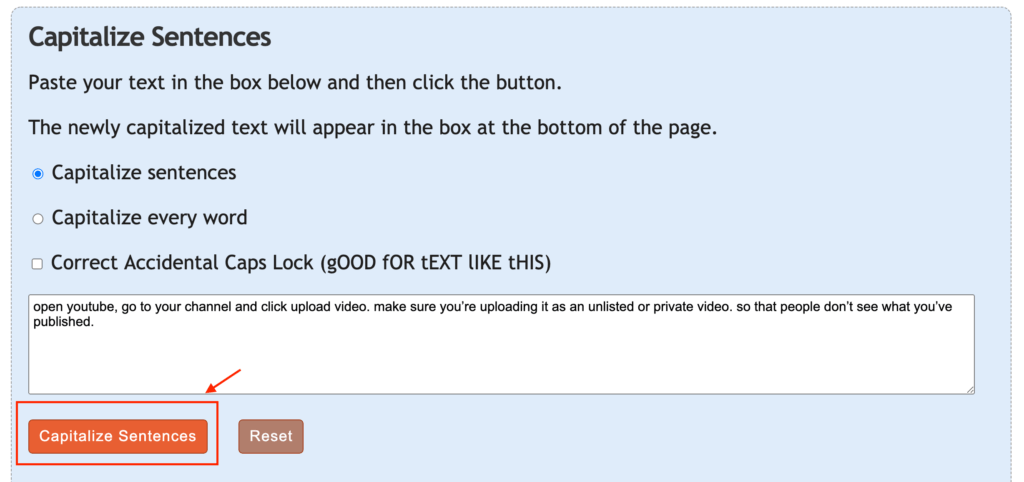
7. Capitalize Sentences
Now that you have added the full stops, copy the text and paste it in the other super useful tool provided by TextFixer – click the button Capitalize Sentences and you’re done!
8. Grab your content and put on your website!
What’s left for you is to review the text you have now, make sure you read it thoroughly in case you missed something. Then it’s ready to be published and shared with your audience.
As easy as this sounds, keep in mind that this is not a fully automated process. It requires a human edit and attention to detail when determining where each sentence ends and starts. It’s also about understanding clutter and what filler words need to be removed from the final version.
But this is by far the easiest and most efficient system for free transcription of audio and video.
[/et_pb_text][/et_pb_column][/et_pb_row][/et_pb_section]