A Pipedrive integration with Ontraport has been a very requested feature. We’ve recently worked on such a project and wanted to share with you the capabilities for syncing data between the two systems.
If you’re using Pipedrive for tracking your sales team, this article will show you how to sync contact records with ONTRAPORT so that you have all the data you need to advance and close a deal.
There are two major cases where you’d like to sync both services. In the first case, your new contacts are added first to Pipedrive and later moved to ONTRAPORT – when you win or lose a deal, for example.
The second case takes into consideration the fact that you are already storing a lot of information about your leads in ONTRAPORT that will be valuable for your sales team to have.
We’ll review both cases and the ways they could be handled.
Pipedrive Integration to ONTRAPORT
If you’re adding your prospects first to Pipedrive before moving them to the marketing tool ONTRAPORT, you have only one way to handle that easily – using Zapier as the intermediary.
Using Pipedrive’s Webhooks to send data to Zapier
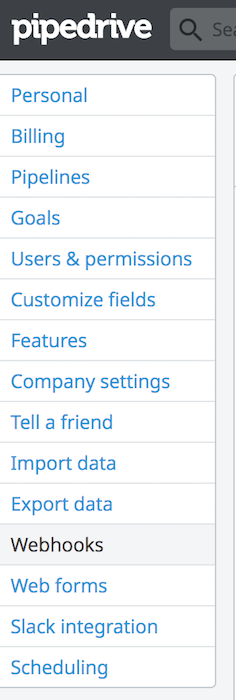
To set this Pipedrive integration we’ll use the built-in webhooks. Webhooks allow you to transfer data to Zapier. You can find the menu when you go to the Settings menu and select Webhooks from the left navigation panel.
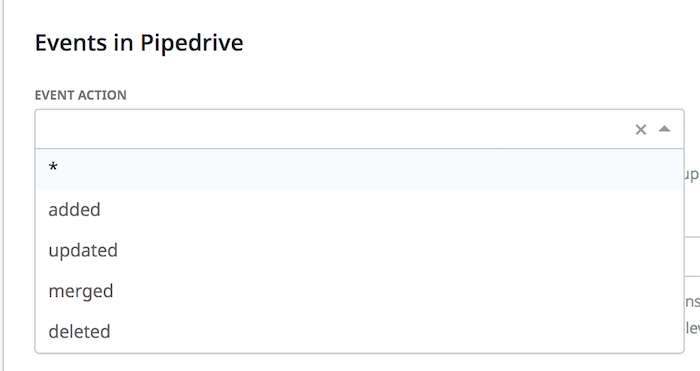
You can choose to send information about one of the following events, listed under Event Actions:
* (All events), Added (a new Event Object is added to your Pipedrive), Updated (an Event Object is updated), Merged (an Event Object is merged), or Deleted (an Event Object is deleted).
The Event Objects dropdown allows you to specify what specific object do you want to update – you can select all or one of the following: Activity, Activity Type, Deal, Note, Organization, Person, Pipeline, Product, Stage, or User.
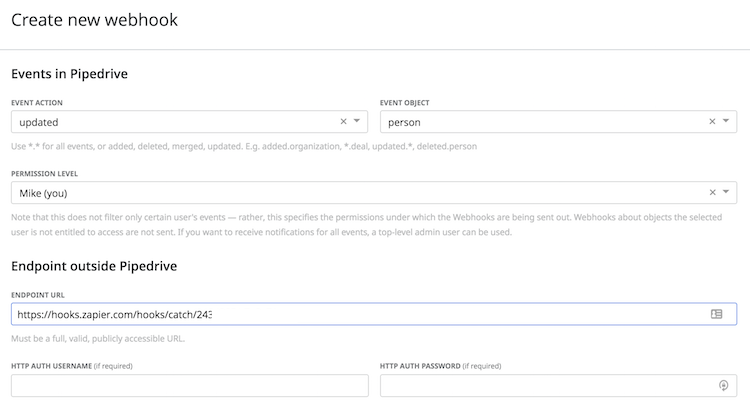
I recommend you always select “person” as this will merge the right way inside of ONTRAPORT and create a contact record for that same person.
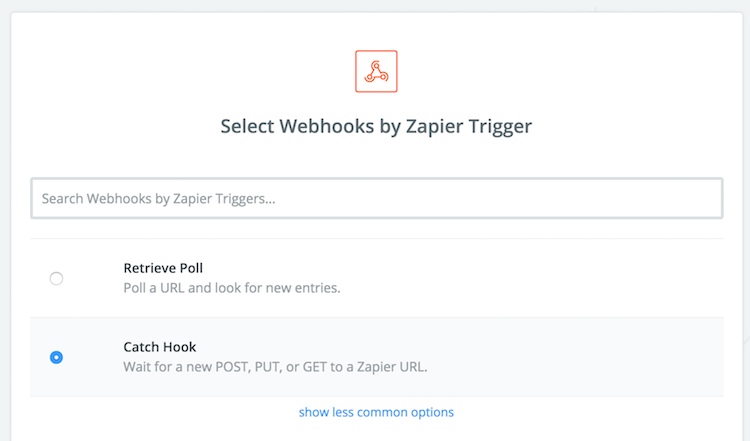
The next step is to complete the Zapier webhook information as shown below:
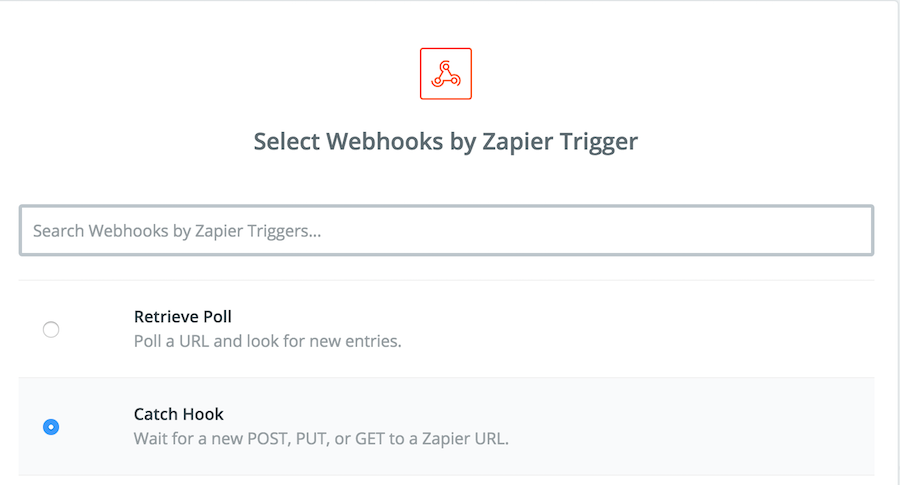
1. Set a webhook catching zap:
2. Paste the webhook URL in Pipedrive, select the settings you want and save:
3. Your next step is to complete the Zap by connecting the data caught by the webhook to be sent to Ontraport.
4. Test your integration and see if the data is being transferred correctly.
Syncing ONTRAPORT to Pipedrive
When you want to pass information from ONTRAPORT to Pipedrive, some problems might arise.
The standard Pipedrive Integration does not allow ONTRAPORT to send information directly through a webhook. That’s where Zapier comes to handle a lot of the frustration.
As we discussed earlier, there are 2 cases where you want to sync data between both tools. Let’s review them
Sync new contacts in ONTRAPORT to Pipedrive
In this scenario, all you need to do is to create a zap that sends data from ONTRAPORT to Pipedrive. It’s the reverse version of the one we discussed above and is as easy to set up.
Sync existing information in ONTRAPORT to Pipedrive
We were recently handling this type of integration for our clients. On a first glance, there is no available solution to help you sync ONTRAPORT fields into Pipedrive on demand. It could either be done when a contact is created or updated, or when a form was filled in by said contact.
Our workaround proved valuable and we are sharing it with you to recreate and use if you need to.
Prerequisites
We make the assumption that you want to pass data from custom or existing fields in ONTRAPORT and send it to Pipedrive. Creating the custom fields beforehand is important for the zap setup.
Pipedrive Integration Zap Step-by-Step Setup Instructions
1. Start by creating a tag inside of ONTRAPORT to use for this specific integration.
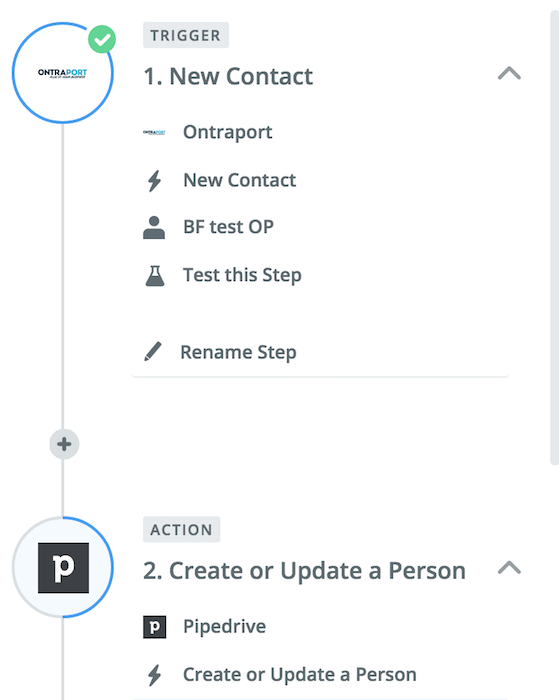
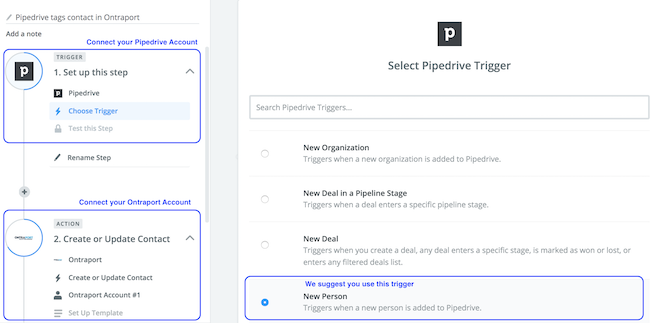
2. Create a Zap that would trigger when a new Contact is added inside of Pipedrive. This event would result in the same person being tagged inside of ONTRAPORT.
Here is the zap that you need to configure:
3. Create a global rule or a campaign trigger in ONTRAPORT with the condition to run when this tag is added to a contact and the outcome Ping URL.
4. Create a second Zap. The trigger this time is a Webhook – with the action to Catch hook.
5. Copy the webhook URL you’re given and paste it into the global rule in ONTRAPORT in the field URL
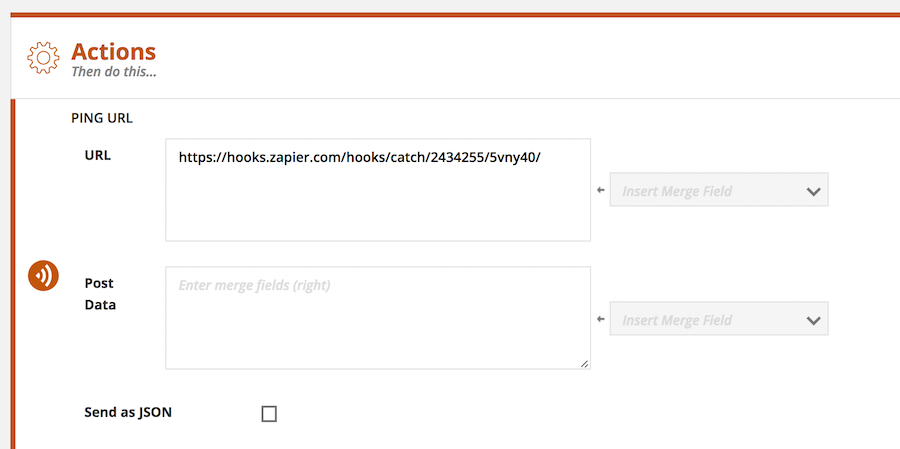 6. Prepare your webhook date in the Post Data field – this is where you will add the contact information you want to send to Pipedrive. Insert merge fields and update the text to follow this syntax:
label=[merge field]&label2=[merge field2]
So here is an example: name=[First Name]&surname=[Last Name]&email=[Email]
The labels you add are identifiers to help you see what data you’re passing in Zapier. They don’t need to be pretty, but I suggest you don’t use random strings of numbers.
7. Save the rule in ONTRAPORT and test it – assign the tag to one test contact that has all custom fields filled in.
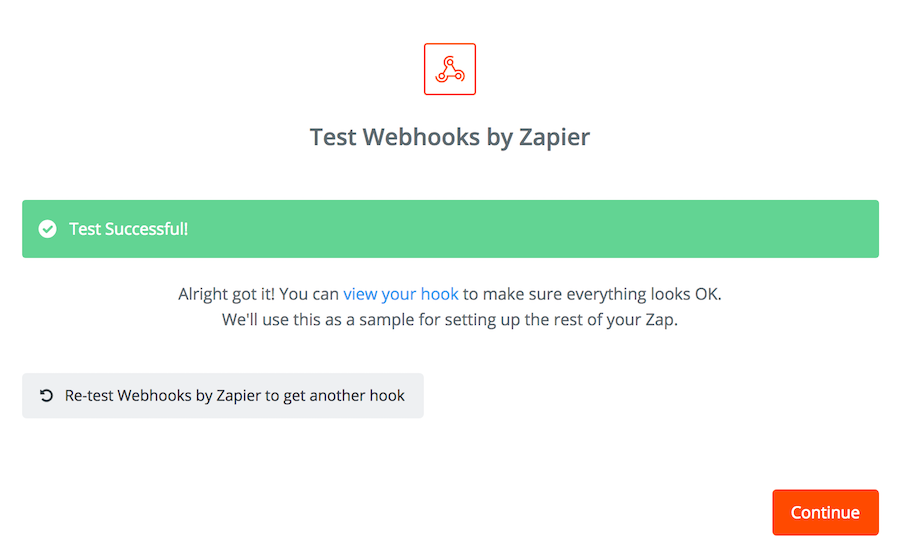
8. In Zapier, test that the webhook is catching your data and continue.
9. Select Pipedrive as the second part of the Zap with the Action to Create or Update a Person.
10. Follow instructions and edit the template to match the field data from ONTRAPORT to the right custom fields in Pipedrive.
11. Test and complete – make sure the integration is sending the right data by adding the tag to 1 test contact first
What’s next?
If you’re not comfortable with setting such integrations yourself, contact us for a quote and we’ll be happy to help.
We hope these step by step instructions are valuable to you – keep using data to make better sales deals with your prospects.
Let me know in the comments which services you’re finding it hard to sync and make work together.

